
viper 5706v installation manual pdf
Welcome to the Viper 5706V Installation Manual, your comprehensive guide for installing and understanding the system. This manual provides essential information to ensure a smooth installation process, covering key components, safety guidelines, and troubleshooting tips to help you get the most out of your car security system. Proper installation is crucial for optimal performance and reliability.
1.1 Overview of the Viper 5706V System
The Viper 5706V is a advanced car security and remote start system designed to provide unparalleled protection and convenience. This system is known for its reliability and user-friendly interface, offering features like keyless entry, remote start, and robust security alerts. It is compatible with a wide range of vehicles and includes cutting-edge technology to ensure your car remains secure. The Viper 5706V is highly regarded for its ease of installation and operation, making it a popular choice among car owners. This overview provides a glimpse into the system’s capabilities and why it is a trusted solution for vehicle security and remote start functionality.
1.2 Importance of Following the Installation Guide
Following the Viper 5706V installation guide is crucial for ensuring proper system functionality, safety, and reliability. Deviating from the instructions can lead to incorrect wiring, which may damage the system or your vehicle. Proper installation ensures all features work seamlessly, providing optimal security and convenience. Additionally, failing to follow the guide may void the product warranty or result in unsafe conditions. By adhering to the manual, you minimize the risk of electrical issues and ensure the system performs as intended. A correct installation also simplifies future troubleshooting and maintenance, saving time and potential repair costs. Always refer to the guide for a successful and hassle-free setup.

System Features and Components
The Viper 5706V offers advanced security features, including remote start, keyless entry, and real-time alerts. The system includes a control module, sensors, siren, and remote for comprehensive protection and convenience.
2.1 Key Features of the Viper 5706V
The Viper 5706V is equipped with cutting-edge technology designed to enhance vehicle security and convenience. Key features include remote start functionality, keyless entry, and real-time alerts for unauthorized access. The system offers advanced encryption for secure communication between the remote and vehicle, ensuring reliability and protection against signal theft. Additional features include shock sensors for impact detection, a high-decibel siren to deter intruders, and compatibility with a wide range of vehicles. The remote control provides intuitive operation, allowing users to arm, disarm, and start their vehicle with ease. These features combine to deliver a robust security solution that prioritizes both safety and user convenience.
2.2 Components Included in the Kit
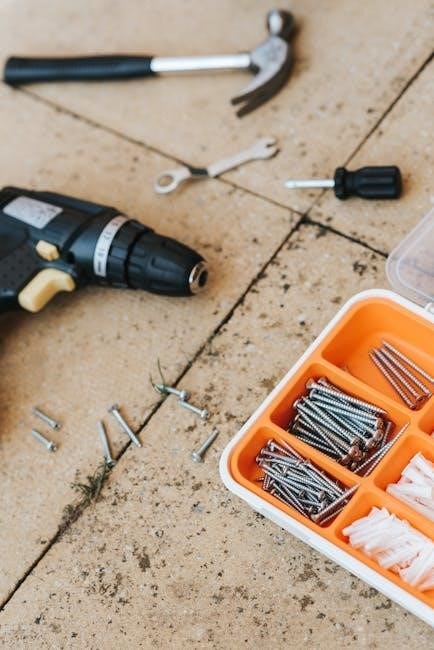
The Viper 5706V installation kit includes a control module, siren, shock sensor, wiring harness, remote controls, and mounting hardware. The control module acts as the system’s brain, managing all functions and connections. The siren provides audible alerts, while the shock sensor detects impacts. The wiring harness ensures secure and organized connections between components. Remote controls offer convenient operation, enabling keyless entry and remote start. Mounting hardware allows for secure installation of the siren and sensors. Additionally, the kit includes an installation guide with detailed instructions and wiring diagrams. These components work together to provide a comprehensive security and convenience solution for your vehicle.
Safety Precautions and Guidelines
Ensure safety by disconnecting the battery during installation to prevent electrical shocks. Handle components with care to avoid damage. Follow all instructions carefully to maintain system integrity and functionality. Always wear protective gear and work in a well-ventilated area. Avoid short circuits and improper wiring to prevent fires or malfunctions. Keep the area clean and dry to ensure reliable performance. These precautions are essential for a safe and successful installation of your Viper 5706V system, protecting both you and your vehicle. Proper adherence ensures optimal results and prevents potential hazards. Safety should never be compromised during the process.
3.1 General Safety Tips for Installation

Always disconnect the vehicle’s battery before starting the installation to prevent electrical shocks or system activation. Wear protective gear, including gloves and safety glasses, to minimize risks. Ensure the workspace is well-ventilated and free from flammable materials. Avoid short circuits by handling wires carefully and keeping them secure. Never modify the system beyond the instructions provided, as this could lead to malfunctions or safety hazards. Keep the installation area clean and dry to prevent slips or electrical issues. Follow all local electrical codes and regulations. Proper grounding of components is essential to ensure safe operation. By adhering to these guidelines, you can safely install your Viper 5706V system and enjoy reliable performance.
- Disconnect the battery first to avoid electrical hazards.
- Use protective equipment to safeguard against accidents.
- Ensure proper ventilation and a dry workspace.
- Avoid short circuits and improper wiring.
- Follow all safety instructions carefully.
3.2 Handling Electrical Components Safely
When handling electrical components of the Viper 5706V, always disconnect the vehicle’s battery to prevent accidental power surges. Use insulated tools to avoid direct contact with live wires. Avoid touching electrical terminals or components with bare hands, as static electricity or moisture could damage the system. Regularly inspect wires for damage or fraying and replace them if necessary. Ensure all connections are secure to prevent short circuits. Use the correct gauge of wire for each connection to maintain system integrity. Never force connectors or components, as this could cause permanent damage. Grounding the system properly is essential to avoid electrical hazards and ensure reliable performance.
- Disconnect the battery before handling electrical parts.
- Use insulated tools to prevent electrical shocks.
- Inspect wires for damage and replace if needed.
- Ensure secure connections to avoid short circuits.
- Proper grounding is crucial for safe operation.
Installation Process
The Viper 5706V installation involves connecting the control module, wiring sensors, and integrating the remote start system. Follow the wiring diagram for precise connections and ensure all components are securely mounted to avoid damage; Refer to the pre-installation checklist to prepare your vehicle and tools. Properly ground the system to prevent electrical interference. After completing the connections, test each feature to ensure functionality. Detailed steps are provided to guide you through the process efficiently and safely.
- Connect the control module carefully.
- Mount sensors and siren securely.
- Follow the wiring diagram precisely.
- Test all features after installation.
4.1 Pre-Installation Checklist
Before starting the installation, ensure you have everything ready. Verify the vehicle’s compatibility with the Viper 5706V system. Gather all tools and components from the kit, including the control module, sensors, wiring, and remote controls. Review the wiring diagram to understand connections. Prepare the vehicle by disconnecting the battery to prevent electrical shocks. Check for any existing alarms or systems that may interfere. Ensure the area is clean and well-lit for ease of access. Familiarize yourself with the installation manual to avoid mistakes. Confirm the remote start feature is compatible with your vehicle’s ignition system. Lastly, ensure the siren and sensors are placed in optimal locations for functionality and security.
- Disconnect the battery for safety.
- Verify vehicle compatibility.
- Gather all tools and components.
- Review the wiring diagram.
- Check for existing systems.
4.2 Wiring Diagram and Connections
The wiring diagram is crucial for a successful installation. Locate the control module, siren, and sensor connections. Ensure the wiring harness matches your vehicle’s electrical system. Connect the battery, ignition, and accessory wires to the appropriate terminals. Refer to the diagram for remote start wiring, including the brake pedal and tachometer connections. Verify all ground wires are securely attached to prevent interference. Use the included wiring chart to identify each cable’s purpose. Double-check connections for accuracy before powering on. Test each component systematically to ensure proper functionality. If unsure, consult the manual or seek professional assistance to avoid system malfunctions.
- Match wiring to the vehicle’s electrical system.
- Securely attach ground wires.
- Test connections before finalizing.
4.3 Installing the Control Module
Installing the control module is a critical step in setting up your Viper 5706V system. Begin by selecting a suitable location for the module, ensuring it is accessible yet concealed from view to prevent tampering. Mount the module securely using screws or adhesive, depending on the surface. Next, connect the wiring harness to the module, carefully matching each wire to its corresponding terminal as indicated in the wiring diagram. Pay particular attention to the power, ignition, and accessory wires, ensuring they are correctly linked to your vehicle’s electrical system. Finally, connect the ground wire to a clean, bare metal surface on the chassis to complete the installation. Double-check all connections for accuracy and test the system to confirm proper functionality.
4.4 Mounting the Siren and Sensors
Mounting the siren and sensors is essential for optimal system performance. Begin by locating a suitable spot for the siren, typically under the hood or in a secure, weather-protected area. Use the provided screws or brackets to fasten it firmly. Ensure the siren is positioned to emit sound clearly. For sensors, install the shock sensor in a central location inside the vehicle, such as near the steering column or under the dashboard. Use double-sided tape or screws for secure mounting. Door sensors should be placed near door locks or hinges to detect unauthorized access. Test each sensor after installation to ensure proper functionality. Avoid exposing components to direct moisture or extreme temperatures for reliability. Proper placement ensures accurate detection and enhances security. Always follow the wiring diagram for correct connections.
4.5 Connecting the Remote Start System
Connecting the remote start system involves integrating the Viper 5706V module with your vehicle’s ignition and starter circuits. Begin by locating the ignition, starter, and accessory wires under the steering column or near the ignition switch. Use the wiring diagram provided in the manual to identify the correct connections. Ensure the remote start module is properly grounded to avoid electrical interference. Connect the positive and negative wires to the appropriate terminals, and use a relay for high-current components like the starter motor. After wiring, program the remote start function by following the steps in the manual, such as cycling the ignition and pressing the remote button. Test the system to ensure the vehicle starts and runs smoothly. If issues arise, consult the troubleshooting section or a professional installer for assistance.

Programming the Remote Control
Program the remote control by turning the ignition on, then off, and pressing the remote button until the system confirms with chirps. Ensure the vehicle starts remotely after programming.
5.1 Initial Setup and Syncing the Remote
Begin by ensuring the ignition is in the “on” position. Press and hold the remote’s button until the system chirps, indicating synchronization. Release the button and test the remote to confirm functionality. If the vehicle doesn’t respond, repeat the process, ensuring proper alignment of the remote with the receiver. After successful syncing, the remote will control all programmed features, including remote start and security functions. Always refer to the manual for specific button sequences and timing to avoid errors during setup.
5.2 Customizing Remote Functions
Customizing the remote functions allows you to tailor the Viper 5706V system to your preferences. Begin by entering programming mode, typically done by pressing and holding the “LOCK” and “UNLOCK” buttons simultaneously. Use the remote to select specific features, such as adjusting the siren volume or enabling silent mode. For advanced settings, refer to the manual for detailed button sequences. After configuring, test each function to ensure proper operation. This step ensures your system operates seamlessly with your vehicle, enhancing both convenience and security. Always follow the manual’s instructions to avoid unintentional feature activation or system malfunctions during customization.

Testing the System
After installation, conduct a full system test to ensure all components function correctly. Check remote start, alarm triggers, and sensor responses. Verify siren activation and remote range performance. Consult the troubleshooting guide for any issues encountered during testing to ensure reliability and security.
6.1 Conducting a Full System Test
After completing the installation, perform a thorough system test to ensure all features function as expected. Start by testing the remote start, ensuring the engine turns on and off correctly. Check the alarm system by triggering sensors and verifying the siren activates. Test door locks, trunk release, and panic mode functionality. Confirm the remote control range and signal strength. Review the manual for specific test procedures tailored to your Viper 5706V system. Address any issues promptly and consult the troubleshooting section if necessary. A successful test ensures your vehicle is secure and all features operate seamlessly, providing peace of mind.
6.2 Troubleshooting Common Issues
If issues arise during or after installation, refer to this section for solutions. Common problems include remote start failure, sensor malfunctions, or siren issues. Check wiring connections for loose or damaged wires. Ensure the control module is properly mounted and configured. Verify that sensors are aligned correctly and free from obstructions. For remote start issues, confirm the virtual tach setup and ignition testing. Consult the manual for specific troubleshooting steps. If problems persist, reset the system or update the firmware. Addressing issues promptly ensures optimal performance and security. Always follow safety guidelines when troubleshooting to avoid further complications.

Maintenance and Updates
Regularly update firmware and software to ensure optimal performance. Inspect wiring and sensors for damage. Clean components to prevent malfunction. Review the user manual for specific maintenance tips.
7.1 Regular Maintenance Tips
Regular maintenance ensures your Viper 5706V system operates effectively. Inspect wiring for damage or corrosion, and clean sensors to maintain accuracy. Check the battery level in your remote control and replace it as needed. Periodically review the user manual for firmware updates and follow the instructions carefully. Ensure all connections are secure to prevent signal loss. Test the system monthly to verify all features are functioning properly. Address any issues promptly to avoid system failure. By following these tips, you can extend the lifespan of your system and ensure reliable performance. Regular checks help prevent potential problems before they arise.
7.2 Updating Firmware and Software
Updating the firmware and software of your Viper 5706V system is essential for optimal performance. Visit the official Directed Electronics website to download the latest updates. Use a computer to connect your system via the provided interface cable. Follow the step-by-step instructions in the manual to ensure a smooth update process. Disconnect the vehicle’s battery before starting the update to prevent interruptions. After updating, test the system thoroughly to verify all features are functioning correctly. Regular updates enhance security, improve functionality, and fix potential bugs. Always refer to the user manual for specific guidance on updating your Viper 5706V system successfully.

Understanding the User Manual
8.2 Key Sections to Review
The Viper 5706V manual includes essential sections for successful installation and operation. Review the installation checklist, wiring diagrams, and troubleshooting guide for common issues. Pay attention to safety precautions and system features to ensure proper setup. The remote control programming section provides steps for syncing and customizing functions. Additionally, the maintenance and FAQ sections offer valuable tips for long-term use and addressing potential problems. By understanding these key areas, you can maximize the performance and security of your Viper 5706V system. Always refer to the manual for detailed instructions and compliance with safety guidelines.
8.1 Navigating the PDF Document
Navigating the Viper 5706V installation manual PDF is straightforward. Use the table of contents to quickly locate specific sections. Bookmark pages for easy reference and utilize the search function to find keywords like “installation” or “troubleshooting.” The document is organized into clear chapters, such as system features, safety precautions, and programming instructions. Familiarize yourself with the layout to efficiently access information. Use zoom tools for detailed wiring diagrams and ensure your PDF viewer is updated for optimal performance. By mastering navigation, you can streamline the installation process and refer to key sections as needed. This will help you make the most of the manual and ensure a successful setup.

Reviewing key sections of the Viper 5706V installation manual is essential for a successful setup. Start with the system features and components to understand the hardware and software. Pay attention to the installation guidelines, wiring diagrams, and troubleshooting tips to avoid common issues. The programming section is crucial for syncing the remote and customizing functions. Familiarize yourself with safety precautions to ensure a secure setup. Additionally, the maintenance and updates section provides tips for long-term system performance. By focusing on these areas, you can streamline the installation process and resolve potential problems efficiently. This will help you maximize the system’s capabilities and ensure reliability.
Frequently Asked Questions
Common questions include installation steps, troubleshooting tips, and system features. Refer to the manual for detailed solutions and guidance on resolving issues and optimizing performance.
9.1 Common Installation Questions
Common questions during installation include wiring issues, remote start functionality, and sensor placement. Many users ask about troubleshooting steps for no-start conditions or false alarms. Others inquire about syncing remotes or understanding LED indicators. Some seek clarification on bypassing factory alarms or integrating with existing systems. Additionally, questions arise about programming the tachometer for remote start and resolving issues like repeated chirping or flashing lights. These topics are addressed with step-by-step solutions to ensure a seamless installation process. The manual provides detailed guidance to resolve these common concerns and optimize system performance. By referring to this section, users can quickly find answers to their most pressing installation-related queries.
9.2 Troubleshooting FAQs
Troubleshooting FAQs address common issues such as no-start conditions, false alarms, and remote sync problems. Users often ask why the system triggers unexpectedly or fails to arm/disarm. Solutions include checking wiring connections, ensuring sensors are properly aligned, and verifying remote battery health. Issues with remote start functionality are frequently resolved by reprogramming the tachometer or adjusting settings. If the siren malfunctions, users should inspect connections and ensure proper power supply. For recurring false alarms, adjusting sensor sensitivity or relocating components may be necessary. These FAQs provide step-by-step solutions to resolve common problems efficiently, ensuring your Viper 5706V system operates reliably and securely.
Successful installation of the Viper 5706V ensures enhanced security and convenience for your vehicle. This manual provides comprehensive guidance, helping you navigate the process confidently and effectively.
10.1 Final Tips for Successful Installation
To ensure a successful installation of your Viper 5706V system, carefully follow the provided instructions and double-check all connections. Test each feature thoroughly after installation to confirm proper functionality. Regular maintenance, such as updating firmware and cleaning sensors, will keep your system performing optimally. If you encounter any issues, refer to the troubleshooting section or contact a professional. Proper installation not only enhances your vehicle’s security but also ensures a seamless user experience. By adhering to these guidelines, you can enjoy the full benefits of your Viper 5706V system for years to come.
10.2 Benefits of Proper Installation
Proper installation of the Viper 5706V system ensures optimal performance, enhances security, and maximizes convenience. A well-installed system provides reliable protection against theft and unauthorized access, giving you peace of mind. It also ensures that all features, including remote start and alarm functions, operate seamlessly. Additionally, correct installation prevents potential damage to your vehicle’s electrical system and extends the lifespan of the components. By following the guidelines, you can avoid costly repairs and enjoy a trouble-free experience. Proper installation also enhances the overall user experience, making it easier to customize settings and utilize advanced features effectively. This attention to detail ensures your investment in the Viper 5706V system delivers long-term benefits and reliability.