
vent-axia control panel instructions
The Vent-Axia Control Panel is an intelligent interface designed to manage ventilation systems efficiently․ It features an LCD display with automatic backlight for easy monitoring and control․
Key features include:
- Advanced monitoring capabilities․
- Customizable settings for optimal performance․
- User-friendly design for seamless operation․
It provides a centralized platform for commissioning and maintaining ventilation units, ensuring energy efficiency and reliability in residential and commercial applications․
1․1 Overview of Vent-Axia Control Panel Features
The Vent-Axia Control Panel offers a range of advanced features to enhance ventilation system management․ It includes an LCD display with automatic backlight for clear visibility and touchscreen functionality for intuitive control․ The panel supports customizable settings, allowing users to tailor operations to specific needs․ Additional features include preset modes, language customization, and compatibility with various Vent-Axia products․ The interface also enables remote monitoring through a mobile app, ensuring seamless control and energy-efficient performance․ These features make it a versatile and user-friendly solution for modern ventilation systems․
- Advanced LCD display with automatic backlight․
- Touchscreen functionality for easy navigation․
- Customizable settings and preset modes․
- Multi-language support for global usability․
- Compatibility with Vent-Axia products․
- Remote monitoring via mobile app․
These features ensure efficient and energy-saving operation, making the Vent-Axia Control Panel a reliable choice for residential and commercial applications․

How to Power On and Basic Operations
Press the power button to activate the control panel․ The system initializes automatically․ Use the interface to navigate basic functions, including fan speed and mode selection․
2․1 Power Button Usage and Initial Setup
The power button is located on the front of the control panel and is used to turn the system on and off․ Pressing the button once will activate the unit, while pressing it again will deactivate it․ During initial setup, ensure the control panel is properly connected to the ventilation system․ The interface will illuminate, and default settings will load automatically․ Use the navigation buttons to cycle through options and configure basic settings․ Refer to the user manual for specific model configurations and additional guidance․
2․2 Understanding Basic Control Panel Functions
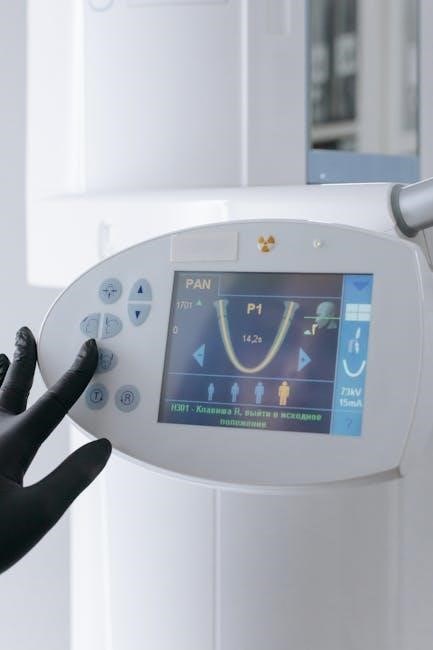
The control panel offers intuitive navigation with buttons for fan speed adjustment, mode selection, and system monitoring․ The LCD display provides real-time data on fan operation, temperature, and airflow rates․ Use the navigation buttons to scroll through menus and select desired settings․ The interface also includes indicators for system status, such as active modes or alarms․ Familiarizing yourself with these functions ensures efficient operation and allows you to optimize your ventilation system’s performance according to your needs․
Installation and Wiring Instructions
Mount the control unit near the ventilation system for easy access․ Connect switches and sensors to the terminal connectors at the bottom of the control unit, following the provided wiring diagrams․ Ensure all connections are secure and match the specified terminals․ Properly insulate ducting in unheated areas to maintain efficiency and prevent damage․ Refer to the Vent-Axia website or product manuals for specific model instructions and troubleshooting guides․
3․1 Connecting Switches and Sensors to the Control Unit
To connect switches and sensors to the Vent-Axia control unit, identify the appropriate terminal connectors at the bottom of the unit․ Match the wires according to the wiring diagrams provided in the manual or on the Vent-Axia website․ Securely attach each wire to the correct terminal, ensuring tight connections to avoid loose contacts․ For sensors, follow the specific instructions for your model, as some may require additional configuration․ Double-check all connections before powering on the system to ensure proper functionality and safety․ Refer to the product manual for detailed guidance if unsure․
3․2 Wiring Diagrams and Terminal Connections
Consult the wiring diagrams provided in the Vent-Axia control panel manual or on their official website․ These diagrams detail the correct terminal connections for switches, sensors, and other components․ Ensure all wires are securely attached to the corresponding terminals, following the color-coding or labeling guidelines․ Verify connections match the diagram to prevent malfunctions․ If unsure, refer to the product-specific manual or contact Vent-Axia support for clarification․ Proper wiring ensures safe and efficient system operation․
Maintenance and Cleaning Guidelines
Regularly inspect and clean the control panel to ensure optimal performance․ Use a damp cloth with mild detergent to wipe surfaces, avoiding harsh chemicals․ Check for dust buildup and ensure proper ventilation around the unit․ Routine maintenance helps prevent malfunctions and extends the product’s lifespan․ Always disconnect power before cleaning for safety․
- Inspect for dust and debris regularly․
- Clean with a damp, mild detergent cloth․
- Ensure proper ventilation around the unit․
4․1 Routine Inspection and Cleaning Procedures
Regular inspection and cleaning are essential for maintaining the Vent-Axia control panel’s efficiency․ Start by turning off the power supply for safety․ Use a soft, damp cloth with mild detergent to wipe the display and exterior surfaces, avoiding harsh chemicals or abrasive materials․ Inspect for dust buildup, especially around vents and buttons, and clean as needed to ensure proper airflow and functionality․ Check all connections and terminals for secureness and signs of wear․ Routine cleaning prevents malfunctions and ensures optimal performance․ Always refer to the manual for specific cleaning recommendations tailored to your model․
- Clean the display gently with a damp cloth․
- Inspect and remove dust from vents and buttons․
- Check connections for security and wear․
- Avoid harsh chemicals to prevent damage․
Regular maintenance ensures the control panel operates effectively and extends its lifespan․
4․2 Troubleshooting Common Maintenance Issues
Common issues with the Vent-Axia control panel include power malfunctions, display problems, and sensor errors․ If the unit fails to power on, check the power supply and connections․ For display issues, ensure the backlight is functional and clean the screen regularly․ Sensor malfunctions may require recalibration or replacement․ Regularly inspect wiring for damage or loose connections․ Refer to the manual for specific troubleshooting steps, and consult a professional if problems persist․ Addressing these issues promptly ensures uninterrupted system operation and optimal performance․
- Check power supply and connections for malfunctions․
- Clean the display and ensure backlight functionality․
- Inspect sensors for accuracy and proper calibration․
- Consult the manual or a professional for unresolved issues․
Advanced Features and Customization
The Vent-Axia control panel offers advanced features like Purge mode activation and sensor customization, allowing tailored system performance․ Special functions enhance efficiency and user experience․
- Activate Purge mode for enhanced ventilation․
- Customize sensor settings for precise control․
- Explore special functions for optimized performance․
5․1 Activating Purge Mode and Other Special Functions
Activating Purge mode on the Vent-Axia control panel is done by pressing and holding the fourth button for 5 seconds․ This function enhances ventilation efficiency by maximizing airflow․ To deactivate, press and hold the same button again for 5 seconds․ Other special functions include energy-saving modes and timer settings, which can be accessed through the control panel menu․ These features allow users to customize their ventilation system for optimal performance and energy efficiency, ensuring a tailored solution for specific needs․
5․2 Configuring Sensors and Custom Settings

Configuring sensors and custom settings on the Vent-Axia control panel allows for personalized ventilation control․ Access the menu system to adjust settings like CO2 levels, humidity, and temperature thresholds․ Use the navigation buttons to scroll through options and confirm changes with the select button․ Sensors can be calibrated to ensure accuracy, and custom profiles can be saved for specific operating conditions․ Refer to the user guide for detailed instructions on advanced configuration options, ensuring optimal performance tailored to your environment․
Downloading and Accessing Manuals
Visit the official Vent-Axia website to access downloadable manuals․ Use the search function with your model number to find specific guides—e․g․, Sentinel Kinetic MVHR instructions․
6․1 Finding and Downloading Specific Model Manuals
To access manuals for your Vent-Axia control panel, visit the official Vent-Axia website․ Navigate to the “Product Search” section and enter your model number in the search bar․ For example, type “Sentinel Kinetic” or “T-Series” to find relevant manuals․ Click on your model to view and download the PDF document․ Ensure you select the correct version for accurate instructions․ This process provides detailed guides for installation, operation, and troubleshooting specific to your unit․
6․2 Navigating the Vent-Axia Website for Resources
Visit the Vent-Axia website and use the “Product Search” tool to find resources․ Enter your model number, such as “Sentinel Kinetic” or “T-Series,” to access specific manuals, datasheets, and guides․ The website is organized into categories, including brochures, installation manuals, and troubleshooting guides․ Use the search bar or browse by product range to locate the information you need․ This streamlined approach ensures quick access to detailed documentation for your Vent-Axia control panel and related products․
Warranty and Support Information
The Vent-Axia warranty policy offers a two-year guarantee from the purchase date, covering faulty materials or workmanship․ Proper installation and usage are required for warranty validity․
7․1 Understanding the Vent-Axia Warranty Policy
The Vent-Axia warranty provides a two-year guarantee from the date of purchase, covering defects in materials or workmanship․ Replacement or repair is offered free of charge, ensuring customer satisfaction․
7․2 Contacting Customer Support for Assistance
For assistance with your Vent-Axia control panel, contact their customer support team via phone or email․ Visit their official website for contact details and resources․ The Vent-Axia support team is available to address inquiries, resolve issues, and provide technical guidance․ Ensure you have your product model number ready for efficient assistance․ Their dedicated team aims to deliver prompt and effective solutions to ensure optimal performance of your ventilation system․